How to do video capturing?
This part of manual describes the necessary preparations and steps how you can convert your video segments (DV tape) into digital files so that you can make use of them in homepage, PowerPoint, Authorware, or creation of VCD.
Reference document (provided by I.T. Teaching Group)
Preparations:
| Hints: | ||
| AVI format -> | High resolution, large file size (for Powerpoint and Authorware) | |
| MPEG format -> | Medium resolution, medium file size (for Powerpoint, Authorware or VCD) | |
| REAL format -> | Low resolution, small file size (for homepage) | |
| WMV format -> | Low resolution, small file size (for homepage) | |
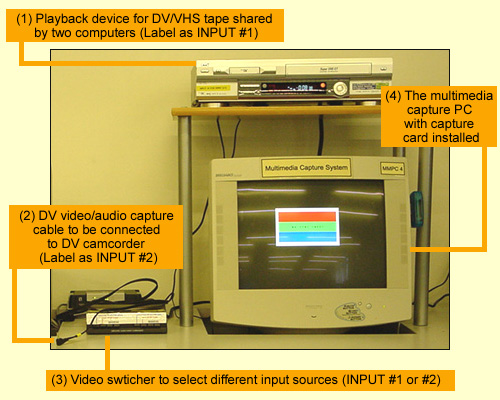
Hardware Components
Procedures:
1. Power on the "Multimedia capture system"
2. Select the suitable INPUT source from the Video Switcher
3. Base on different INPUT source, follow the procedures shown below:
|
INPUT #1(JVC
playback device)
|
INPUT #2
(DV camcorder)
|
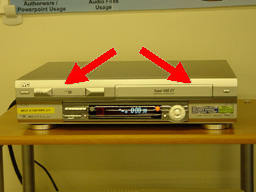
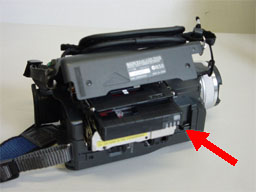
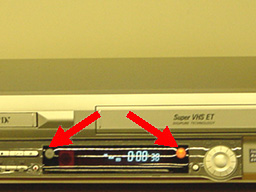
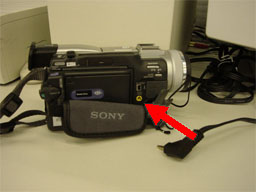
| 3.1 Insert the digital video tape or VHS tape to appropriate positions | 3.1 Insert the digital video tape into the mini DV camcorder |
 |
 |
| 3.2 Select the source by pressing button "VHS" or "DV" |
3.2 Connect the video connection line to the computer and power on the DV camcorder |
 |
 |
4. Launch the folder named "Multi-media Packages" on the window desktop

5. Launch the application named "Studio Version 7"
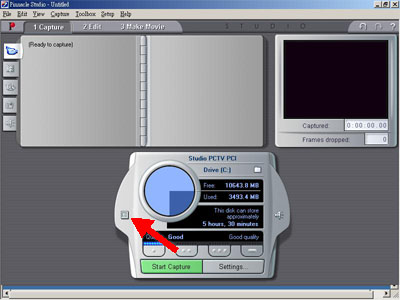
6. Select "1 Capture" tab and click the icon as shown below
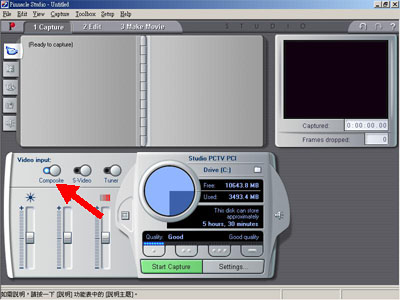
7. Select "Composite" from "Video input:"
8. Click "Settings" and made the settings that you need:
For "Capture source":
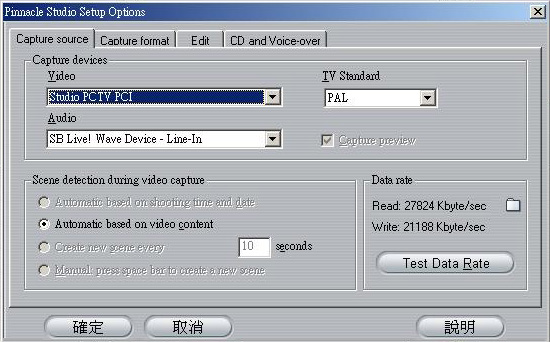
For "Capture format":
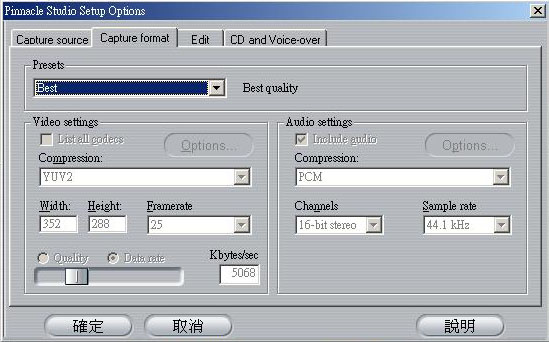
Note: If you select "Custom" from "Presets", we recommend you not to change the compression type since it may cause error during capturing
(For INPUT #2 ONLY - DV Camcorder User) At the mini DV camcorder, switch to VCR mode and press "Play" button to start playing your video. You will see the video playing in the preview window in the computer
9. Click "Start Capture" button inside the application
10. After capture, click "Stop Capture" button inside the application "Studio PCTV"
11. If you need editing (cut or join) your video, select "2 Edit" tab to edit the video; else select "3 Make Movie" tab
12. Select the format of the output file whether is AVI, MPEG, Stream (Real) or Stream (WMV)
Note: If you are creating VCD, make sure that the output file is in MPEG format
13. Click "Create AVI/MPEG/Stream File" button and save the video to the destination where you like. The system will then generate your final video file. The necessary time for the generation depends on the length of your video. Here are the speed and file size for a 2 minutes video:
|
File Format
|
Required
Time
|
File Size
|
|
AVI
|
18 mins
|
104 MB
|
|
MPEG
|
18 mins
|
20.6 MB
|
|
Real (For
56K Modem)
|
3 mins
|
520 KB
|
Note: Here are the settings for different file format
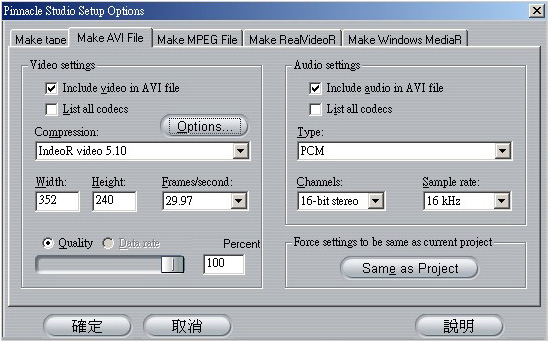
For AVI Setting (Note: Here is not suggest you to change the settings)
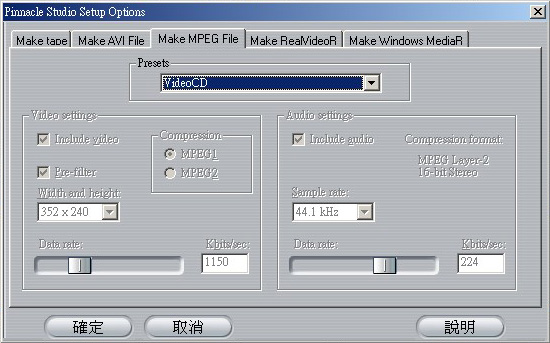
For MPEG Setting (Note: User can change the Presets base on different purposes)
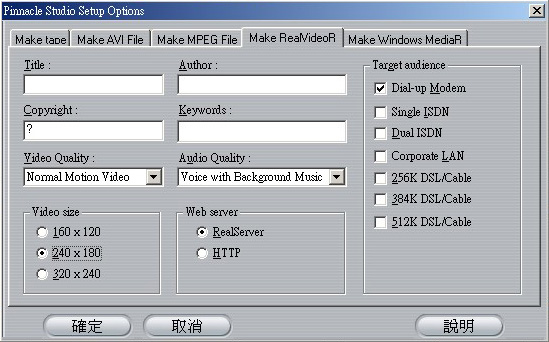
For REAL Setting (Note: User can change the settings base on different purposes)
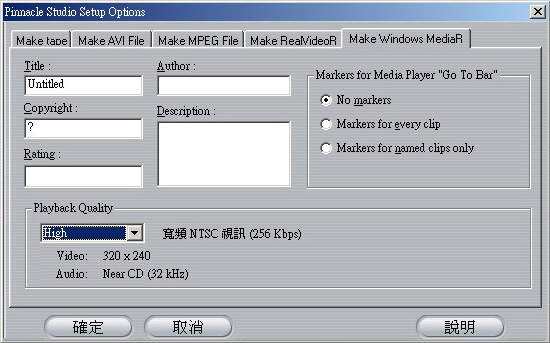
For Windows MediaR Setting (Note: User can change the Playback Quality)
~ End ~